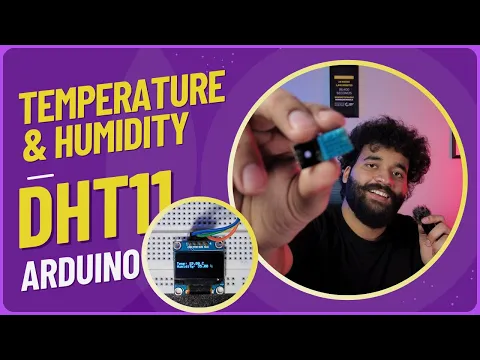
DHT11
Details of DHT11

Unveiling the Secrets of Temperature & Humidity: A Deep Dive into the DHT11 Sensor (Khurafati Labs Edition!)
I've used this little guy in so many of my projects, from basic weather stations to automating my plant watering system. Today, we're not just going to talk about what it does, but we're going to pull back the curtain and get into the nitty-gritty technical details that make it tick. Let's dive in!
What is the DHT11 Sensor? Your Go-To Environmental Buddy!
The DHT11 is a commonly used and very affordable sensor that provides digital output of both temperature and humidity. It's known for its simplicity and ease of use, making it a favorite for hobbyists and makers like us. While it might not be the most precise sensor out there (we'll talk about that!), it's fantastic for basic environmental monitoring applications.
Key Technical Specifications You Need to Know:
To truly understand the DHT11, let's look at its core specs:
Operating Voltage: 3V to 5.5V (So yes, it works perfectly with your 5V Arduino Uno!)
Current Consumption:
Measuring: 0.5mA (milliampere)
Standby: 100uA (microampere) – Super low power when not actively measuring!
Temperature Range: 0°C to 50°C
Accuracy: ±2°C
Humidity Range: 20% to 90% RH (Relative Humidity)
Accuracy: ±5% RH
Sampling Rate (Max): 1 Hz (meaning you can take one reading per second)
Output Signal: Digital, single-wire bi-directional serial data. This is super important!
Dimensions: Roughly 15.5mm x 12mm x 5.5mm (tiny and easy to fit anywhere!)
How Does It Work? The Internal Magic!
The DHT11 might look simple on the outside, but it's got some clever tech packed inside:
Humidity Sensing:
The sensor uses a capacitive humidity sensor. This is essentially two electrodes with a moisture-holding substrate in between them.
When the humidity changes, the dielectric constant of the substrate changes, which in turn changes the capacitance between the electrodes.
The DHT11's internal circuitry measures this capacitance change and converts it into a digital humidity value.
Temperature Sensing:
For temperature, the DHT11 utilizes a thermistor. A thermistor is a type of resistor whose resistance changes significantly with temperature.
As the temperature changes, the resistance of the thermistor changes, and the sensor's internal circuitry measures this change and converts it into a digital temperature value.
Microcontroller & A/D Conversion:
Inside the DHT11, there's a small integrated microcontroller. This microcontroller handles the analog-to-digital (A/D) conversion for both the humidity and temperature readings.
It then processes these readings and formats them into a specific digital signal that your Arduino can easily understand.
The Single-Wire Communication Protocol: Sending Data to Your Arduino
This is where it gets a bit technical but is crucial to how we communicate with the DHT11. Unlike sensors that use multiple pins for data, the DHT11 uses a single-wire bi-directional serial data bus. This means one data pin does all the talking between the sensor and your microcontroller (like the Arduino Uno).
Here's a simplified breakdown of the communication sequence:
MCU (Arduino) Sends Start Signal: Your Arduino first sends a "start" signal by pulling the data line LOW for at least 18 milliseconds (ms) and then pulling it HIGH for 20-40 microseconds (µs). This tells the DHT11, "Hey, I'm ready to receive data!"
DHT11 Responds: The DHT11, sensing the start signal, responds by pulling the data line LOW for 80µs and then HIGH for another 80µs. This is its way of saying, "Got it, I'm sending data now!"
DHT11 Sends Data: After its response, the DHT11 sends 40 bits of data (5 bytes). Each bit is sent as either a LOW pulse followed by a short HIGH pulse (for a '0') or a LOW pulse followed by a longer HIGH pulse (for a '1').
Data Structure:
Byte 1: 8-bit humidity integer data
Byte 2: 8-bit humidity decimal data (usually 00 for DHT11 as it only gives integer values)
Byte 3: 8-bit temperature integer data
Byte 4: 8-bit temperature decimal data (usually 00 for DHT11)
Byte 5: 8-bit checksum data (used to verify if the received data is correct)
MCU (Arduino) Receives Data: Your Arduino reads these 40 bits, stores them, and then performs a checksum verification. If the checksum matches, you've got valid temperature and humidity readings!
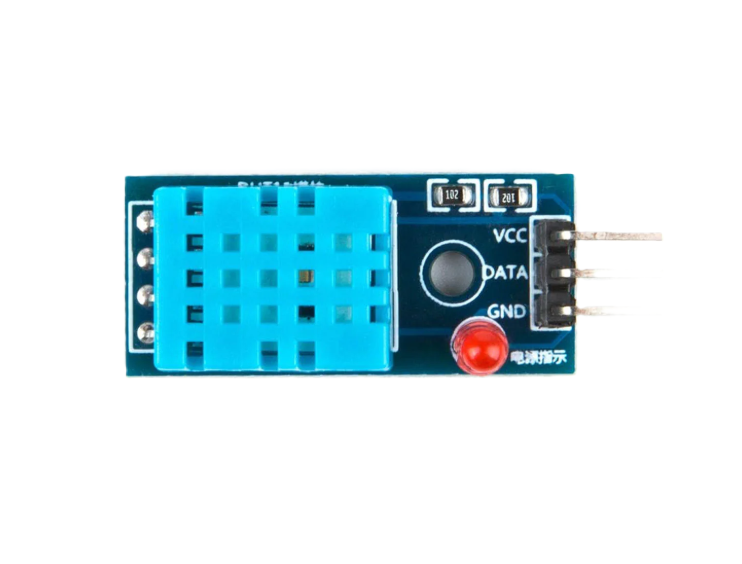
Pinout: Connecting Your DHT11
The DHT11 usually comes with 3 or 4 pins. If it has 4 pins, one is often not connected (NC - Not Connected). If it's on a small PCB (module), it usually just has 3 pins:
VCC (or +): Connects to 3.3V or 5V on your Arduino (usually 5V for Arduino Uno).
Data (or OUT): This is the single bi-directional data line. Connect it to any digital pin on your Arduino (e.g., Digital Pin 2).
GND (or -): Connects to the Ground (GND) pin on your Arduino.
Important Note: For reliable communication, it's recommended to add a 10K Ohm pull-up resistor between the VCC and the Data pin. While some DHT11 modules have this built-in, it's good practice to add it if you're using the bare sensor. This resistor ensures the data line is HIGH when idle, preventing floating issues.
Why Choose the DHT11? (And its Limitations)
Pros:
Low Cost: Super affordable, perfect for budget-friendly projects.
Easy to Interface: Simple single-wire communication makes it relatively easy to connect.
Digital Output: No need for complex analog-to-digital conversions on your Arduino's side.
Small Size: Compact design fits easily into enclosures.
Cons (What to keep in mind!):
Limited Accuracy: With ±2°C for temperature and ±5% RH for humidity, it's not suitable for applications requiring high precision.
Slow Sampling Rate: 1 reading per second might be too slow for some dynamic environments.
Limited Range: The temperature and humidity ranges are relatively narrow compared to other sensors.
No Decimal Humidity: It only provides integer values for humidity.
My Favorite Uses for the DHT11:
Despite its limitations, I absolutely love the DHT11 for:
Simple Indoor Weather Stations: Monitoring conditions in my room or workshop.
Automated Plant Watering Systems: Deciding when to water based on soil moisture AND ambient humidity.
Comfort Monitors: Knowing if a room feels too hot or too humid.
Teaching & Learning: It's a fantastic sensor to start with for understanding data acquisition.
Ready to Get Your Hands Dirty?
The DHT11 is an awesome starting point for adding environmental sensing to your Arduino projects. Understanding its technical details empowers you to troubleshoot and build more robust systems. I highly recommend picking one up and experimenting!
What cool projects are you planning with your DHT11? Or do you have any questions about its workings? Drop them in the comments below!
Missed our video on DHT 11? Catch it here: